InnoFit® Lodestar Kit
[KLS001]
- A cost-effective guided surgery solution applicable to various types of clinical cases.
- Universal to any implant system.

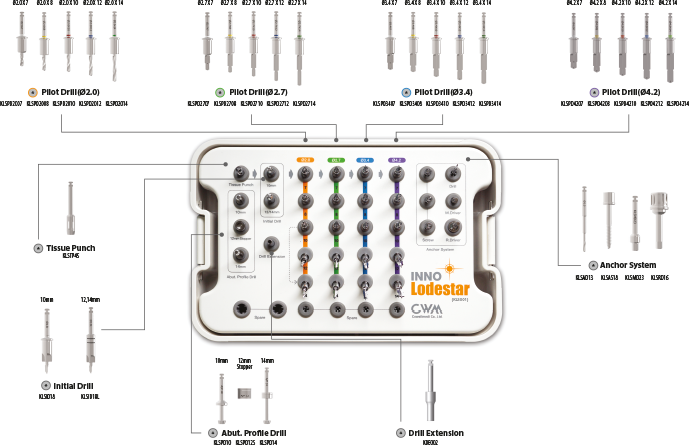
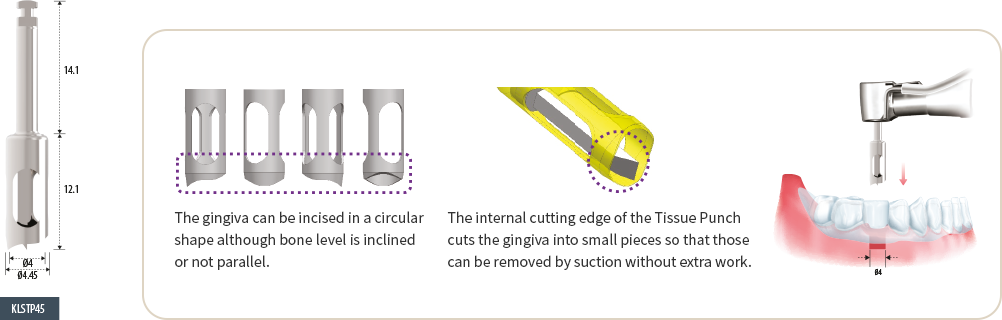
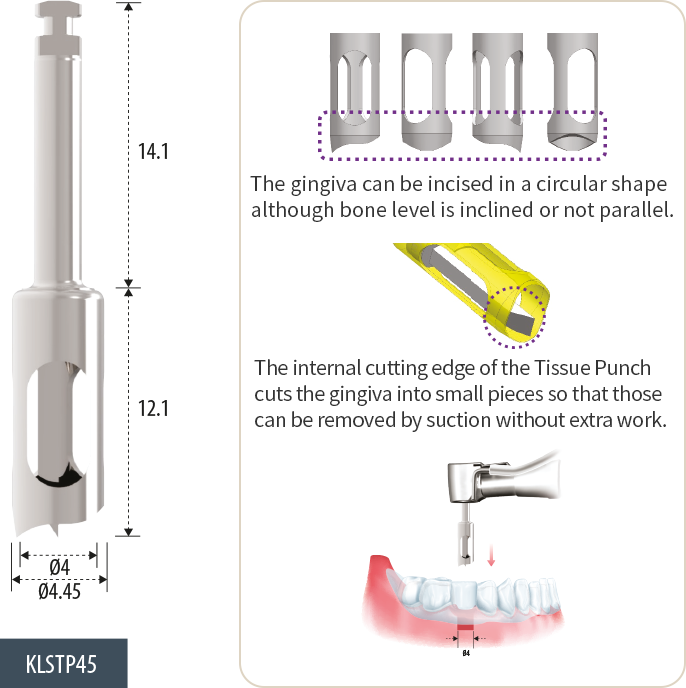
Tissue Punch
- The gingiva in the position where the implant is to be placed can be incised in a circular shape, and it can also be used in inclined bones (50 rpm without irrigation).
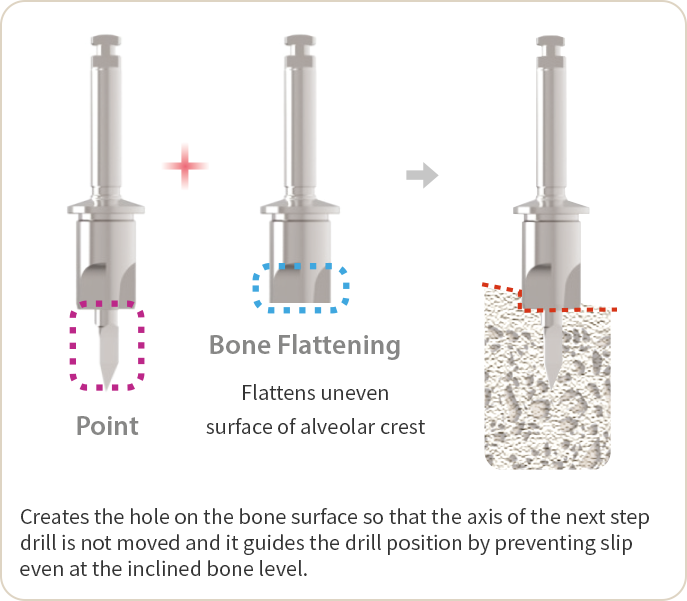
Initial Drill
- The drill combined with bone flattening drill and point drill which no separate bone flattening drill is required provides simper procedure and shorter chair time (1,000 rpm with irrigation).

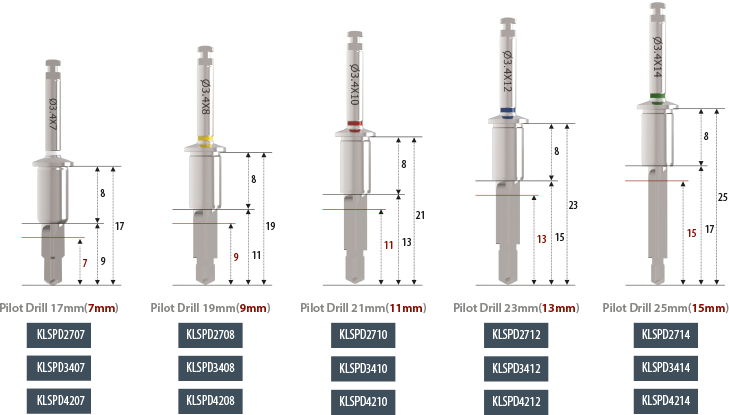
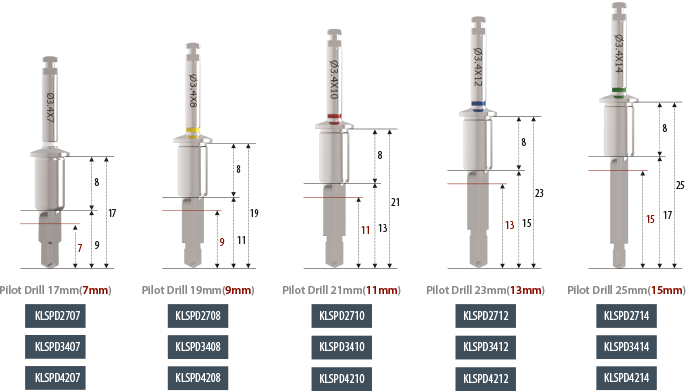
Pilot Drill
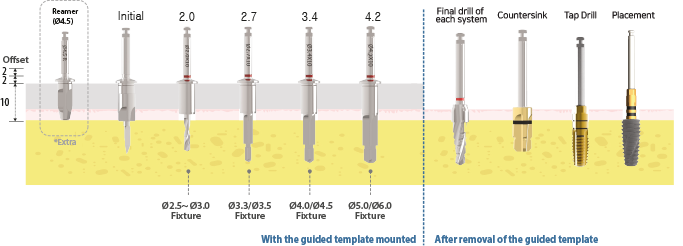
- > Ø2.0 / Ø2.7 / Ø3.4 / Ø4.2.
Ø2.0 : High Speed - 600 rpm
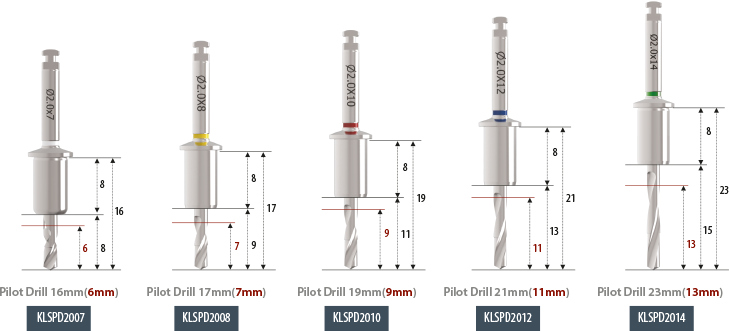
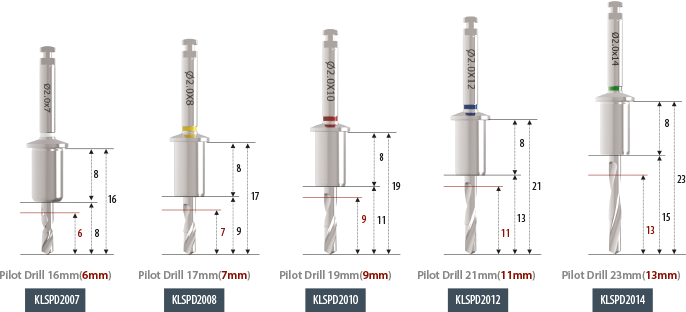
Ø2.7 / Ø3.4 / Ø4.2 : Low Speed 50~200rpm/50Ncm
Abutment Profiler
- Used for elimination of the alveolar bone that interferes with the accurate connection of abutment.
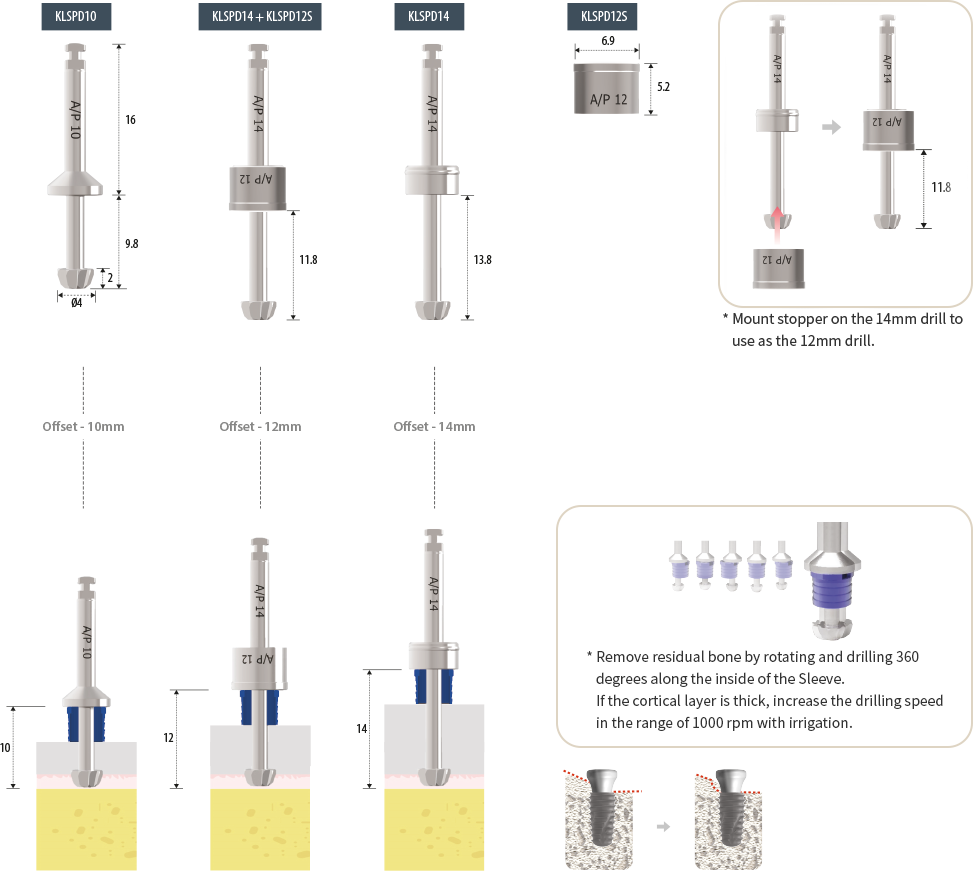
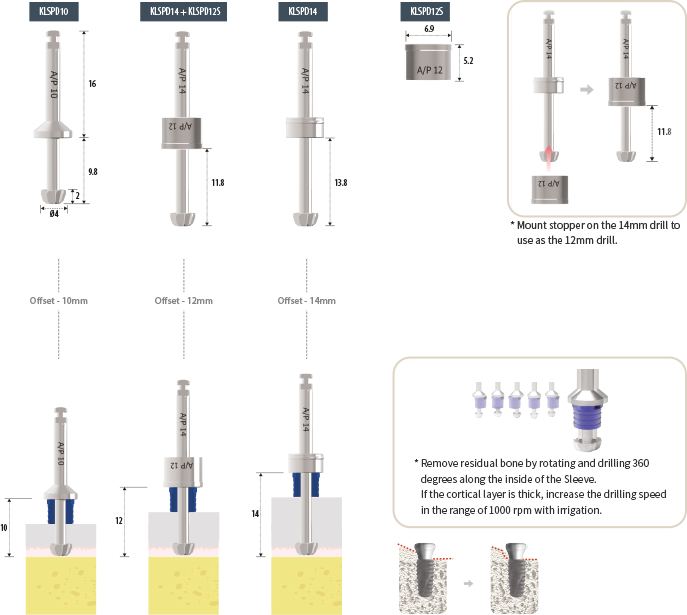
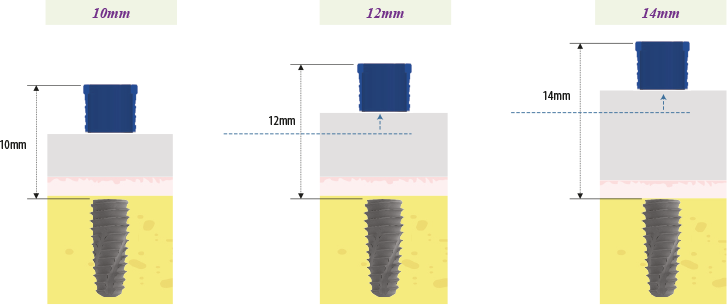
* Offset length setting
- The basic length from the fixture platform to the top of the Sleeve is 10mm.
- In case that gingival is thick or fixture needs to be placed deeper due to low bone density, use the Sleeve 2 or 4mm upright to the top.
- The higher offset value, the less accurate it will be, so use 10 mm if possible.

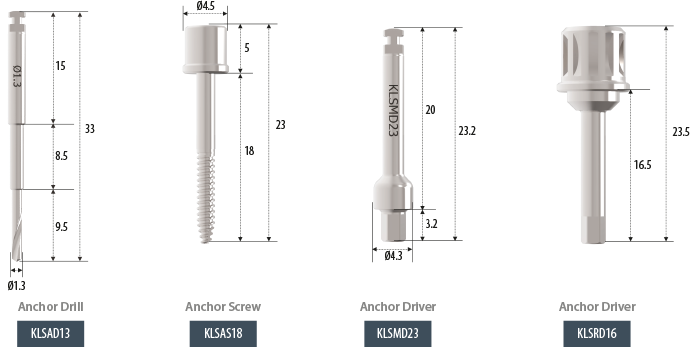
Anchor System

Optional
- These products are optional as extra ones which are not included in the kit.
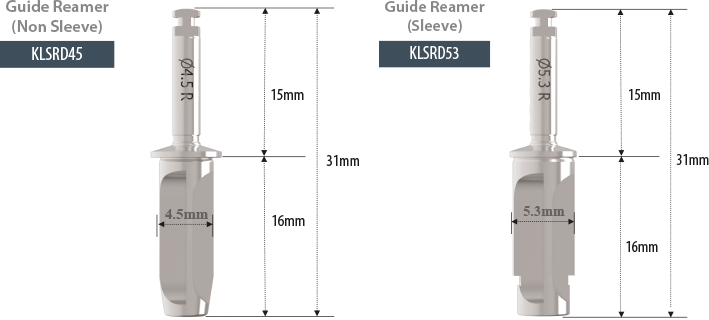
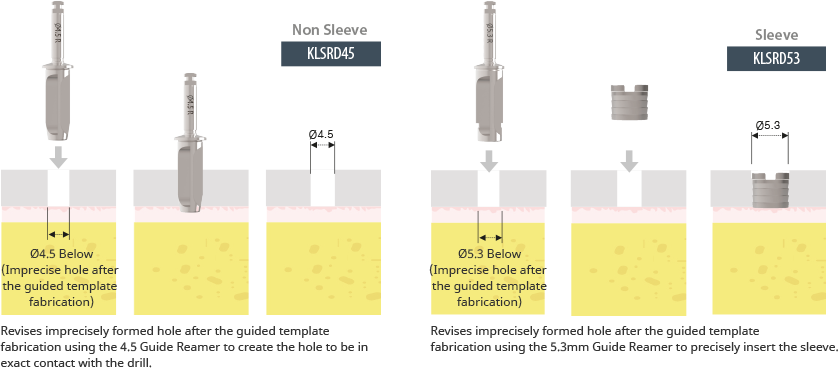
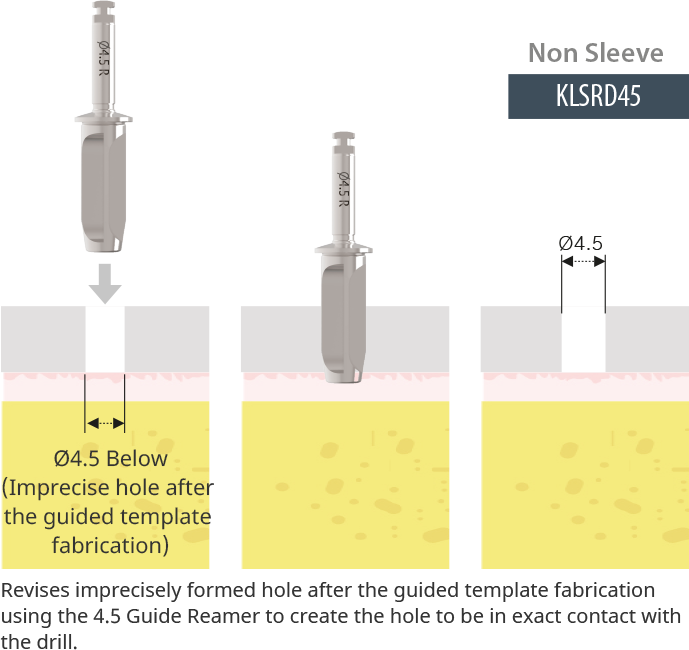
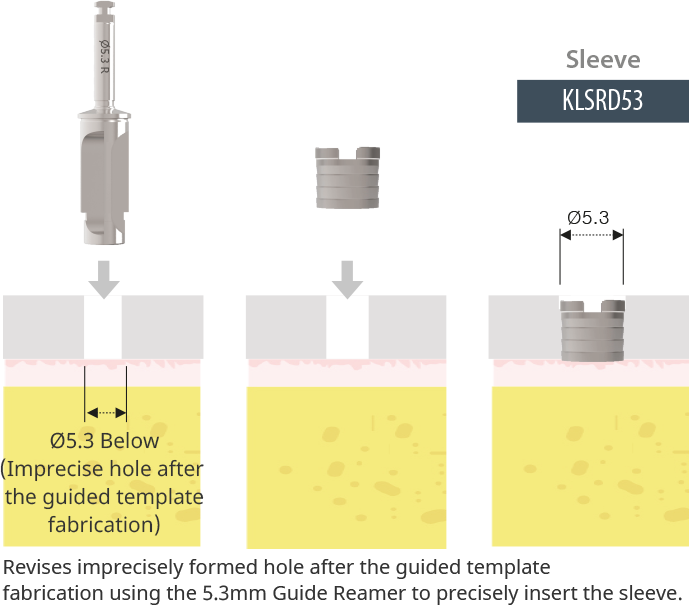
Guide Reamer Extra
Used for precise contact of drill and sleeve (sleeve/non sleeve).
Use the 4.5mm Guide Reamer for non sleeve, and the 5.3 Guide Reamer for sleeve (800 rpm without irrigation).

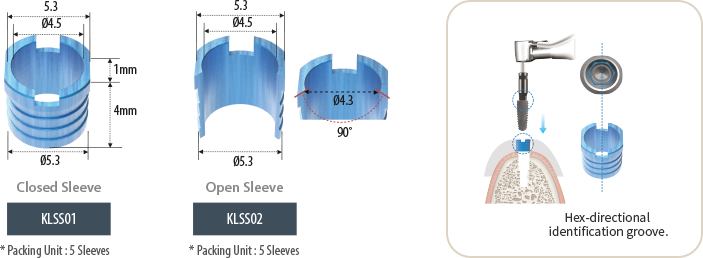
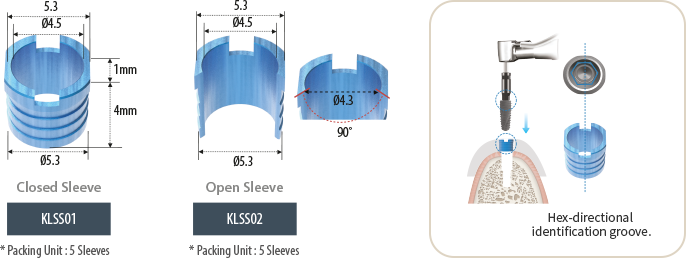
Sleeve Extra
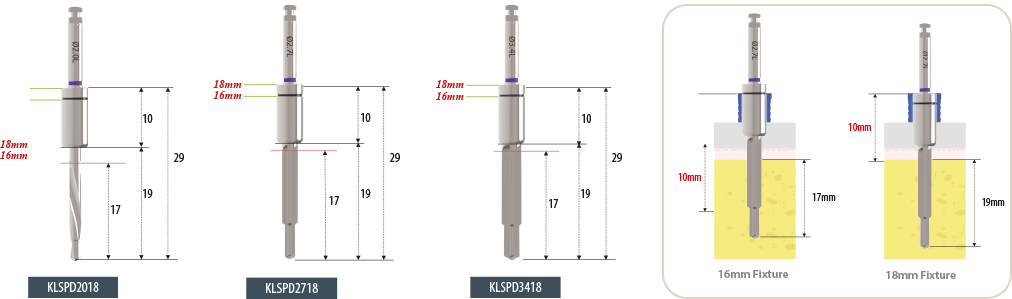
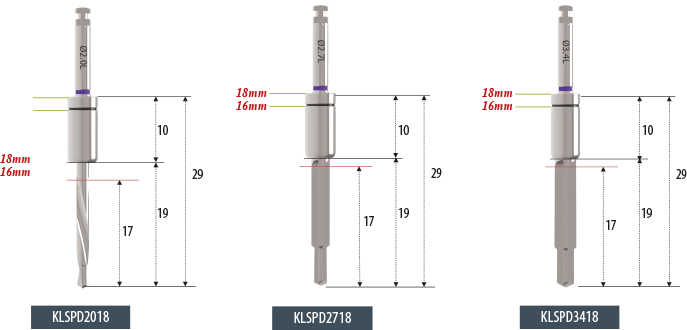
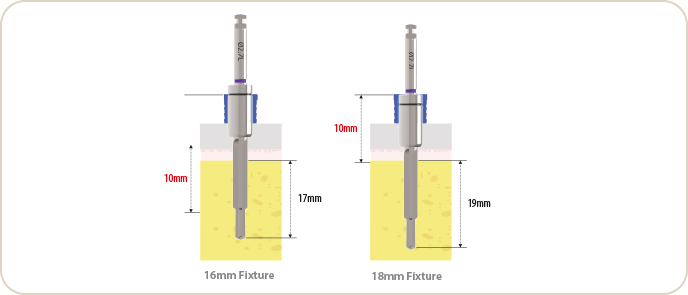
Pilot Drill – 16/18mm Extra
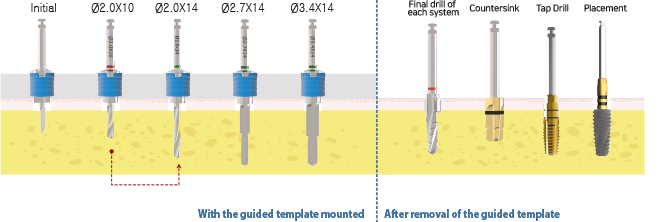
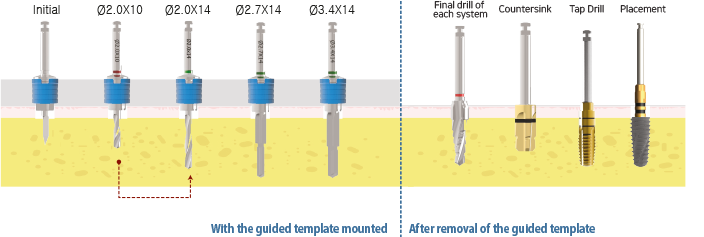
Drilling Sequence
Drill Protocol (Non Sleeve)
Drill Protocol (Sleeve)
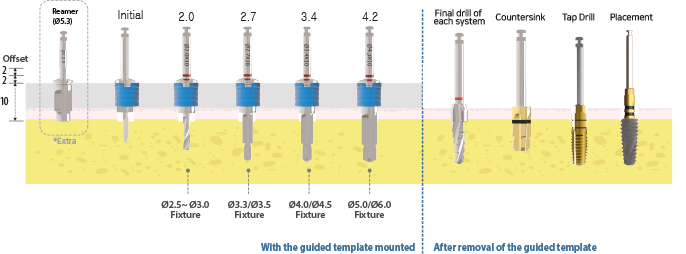
* The 14mm drill must be used after using the 10mm drill to enable sleeve contact
For the use of the 14mm drill with exact contact to the sleeve, use the Ø2.0x10mm drill first before using the 14mm drill.
e.g.) 3.4 X 14mm Drilling Sequence
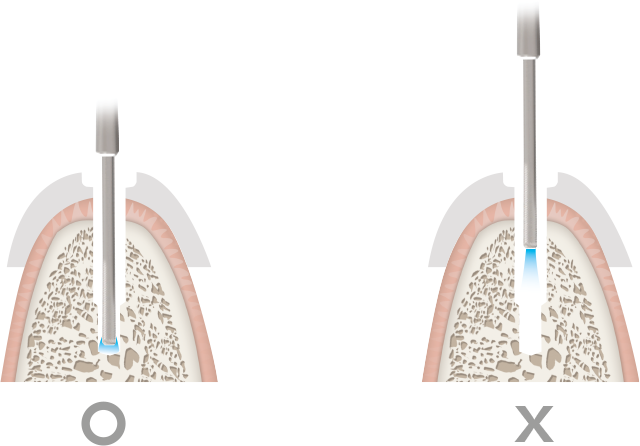
* Drilling method
- Make sure with drilling in a desired direction without a change in path through the primary drill contact (A) with the hole created by the previous drilling and the secondary contact (B) with the sleeve.
- Create the hole using the initial drill and insert the next drill into the hole made during the previous step and drill after achieving the drill and sleeve contact (A&B).
- If drilling only with the sleeve contact (B) without the drill contact (A), the path may not be correct.
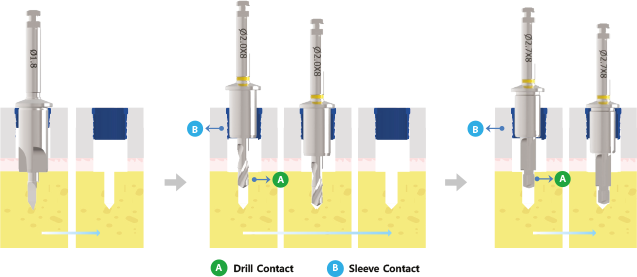
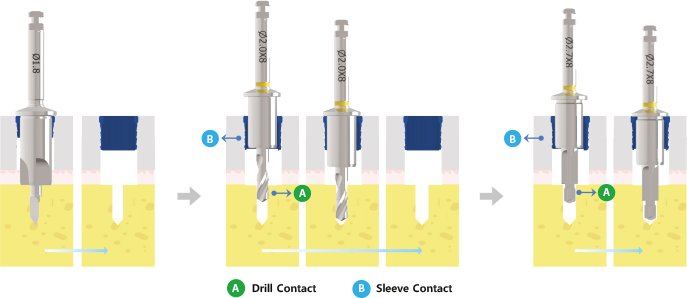
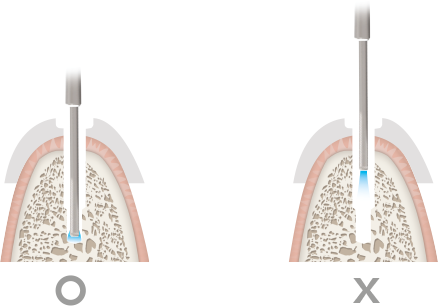
* Precaution when irrigating
- Irrigate enough to the end of the drill hole.