Volume-Up™ Guide System
- Devised for preventing food penetration and forming natural cervical area by restoring contracted buccal alveolar bone & gingiva to the original shape and width.
1. CONCEPT
- Peri-implant inflammations represent serious diseases after dental implant treatment, which affect both the surrounding hard and soft tissue.

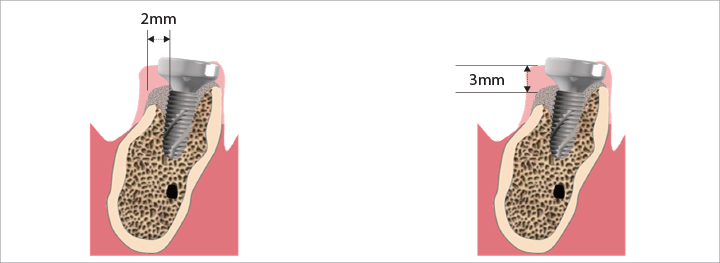
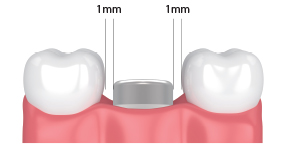
To achieve long term success of implant without complications like peri-implantitis, right position of fixture with min. 2mm of buccal bone width for buccal gingival regeneration and alveolar bone regeneration at min. 3mm lower position to maintain gingival height is extremely essential.
Min. 2mm of buccal bone regeneration to maintain having buccal gingiva.
(Int J Periodontics Restorative Dent 2005)
Alveolar bone regeneration at minimum 3mm lower position to maintain gingival height.
(Clin Oral Implants Res 2000;11: 1–11.)

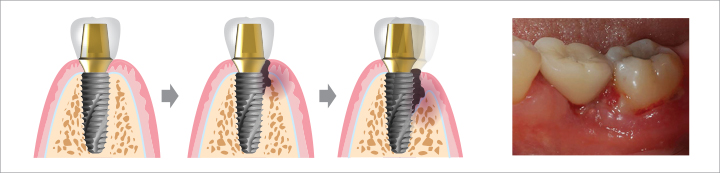
The Volume-Up™ Guide System helps place implant in the right position according to 2 abovementioned clinical factors and helps select right dimension of the Healing Abutment to be used as a scaffold while gingival forming.
2. SPECIFICATION
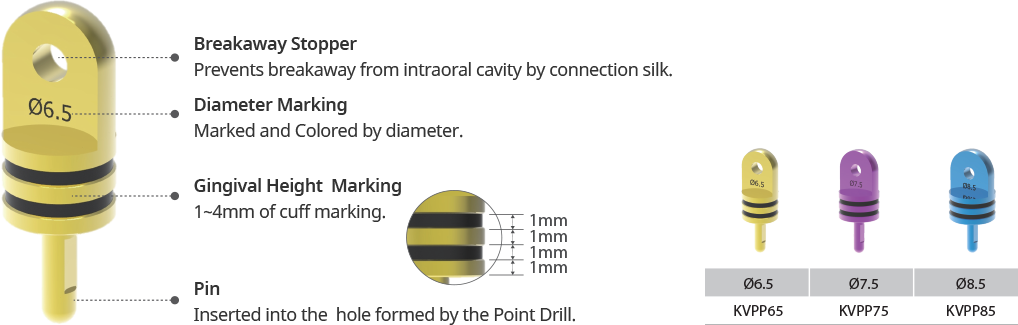
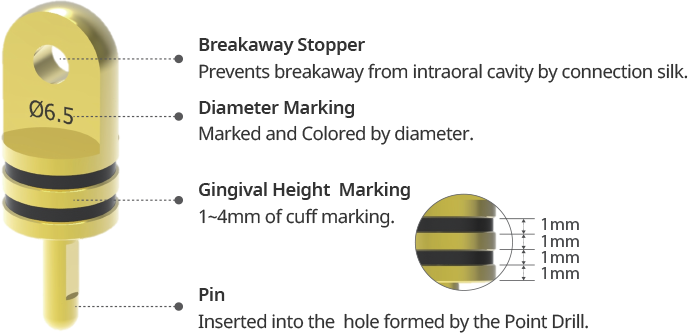
Volume-Up™ Gauge [KHSG01]
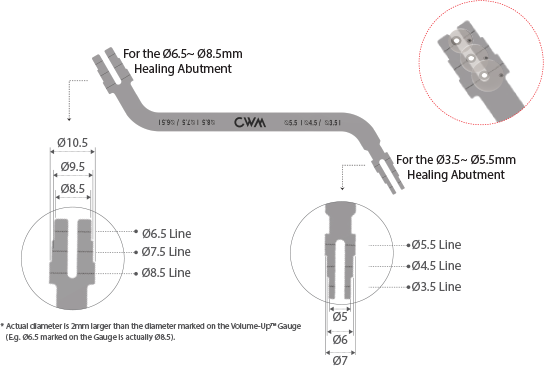

- Used to guide the position of implant placement and to guide the election of the Healing Abutment dimensions in order to keep the cervical portion of the implant prosthesis at the natural tooth width.
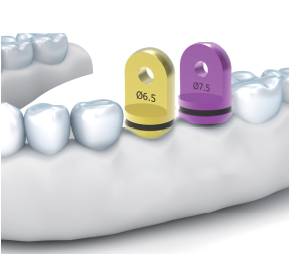
- Used with the Volume-Up™ Parallel Pin for multiple units or bridge.
- Used with Point Drill (Ø2.1mm or less).
- Laser marking identifiable from any position.
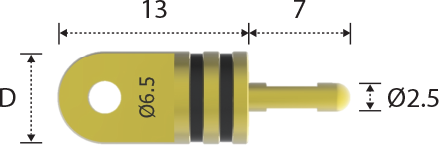
Volume-Up™ Parallel Pin


3. PROCEDURE
I. Single Implant
-
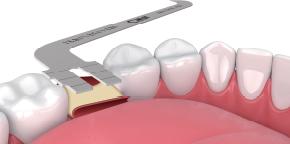
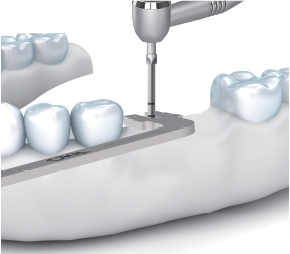
Set the Volume-Up™ Gauge on the implant site according to the diameter line marked on the Volume Up™ Gauge.
-
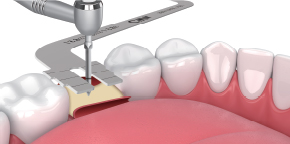
Position the Point Drill in the drill insertion groove of the Volume-Up™ Gauge.
-

Drill and place implant in accordance with the manufacturer’s implantation sequence.
-
If implant placement torque is equal to or over 20~30N.cm, connect the Healing Abutment. If not, connect the Cover Screw and do primary closure.
II. Multiple Implants & Bridge
-
Set the Volume-Up™ Gauge and position the Point Drill.
-
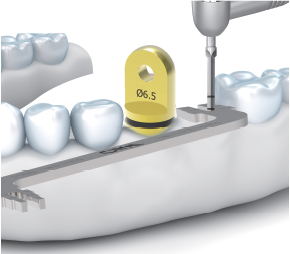
Insert the Volume-Up™ Parallel Pin into the hole formed after point drilling.
-
Carry out the same as the previous step.
4. Clinical Case
-

Preoperative view of the healed ridge.
-
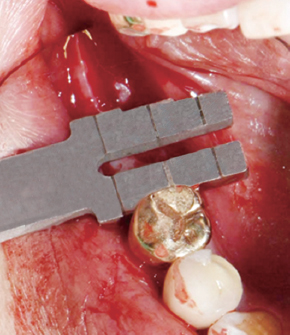
The Volume-Up™ Gauge was set to the 8.5 line and point drilling was carried out.
-
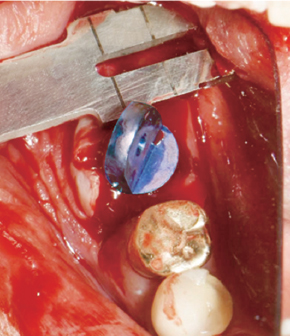
The Ø8.5 Volume-Up™ Parallel Pin was inserted to the hole formed by point drilling and point drilling was done at the next site guided by the Volume-Up™ Gauge.
-
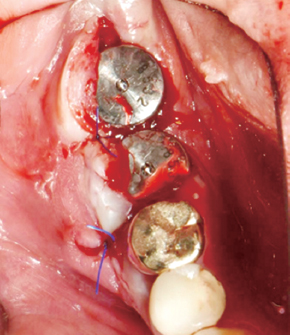
The Ø8.5 Healing Abutments were placed after initial & finial drilling and fixture placement and bone grafting, and the site was sutured.
-
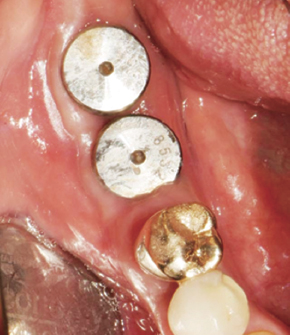
After 4 weeks, the contracted buccal alveolar bone & gingiva to the natural shape and width were restored.
Which will allow esthetically and functionally great prosthesis fabrication preventing food permeation.