Direct Surgical Guide Kit[KDSG002]
- Used for a flapless surgery.
- Served as a guide for positioning the drill while measuring the thickness of the buccal bone, thereby preventing bone resorption and reducing the burden on the patient.
- Stable drill positions can be guided to various cases by combining different surgical instruments (E.g., Position Guide, Linker and Width Guide).
1. Safety
- Safe operation is possible by measuring the thickness of the buccal bone in order to prevent buccal bone resorption.
2. Reduced Pain
- It is possible to minimize the burden on the patient by reducing the pain and swelling from a flapless surgery without going through the incision step that is carried out during the general implant surgery.
3. Accuracy and Diversity
- An accurate operation is possible depending on the bone width and implant diameter by combining the operation instruments (E.g., Linker, Position Guide and Width Guide). It can be used for various cases, such as single, bridge, etc.
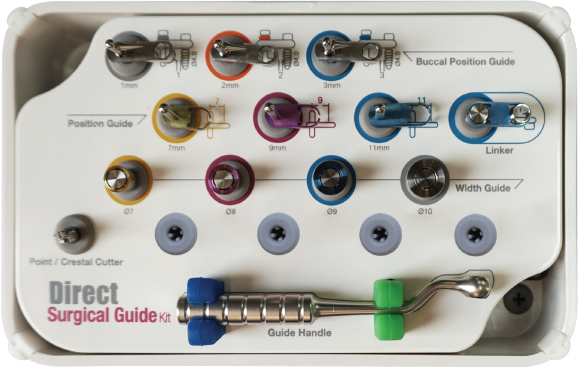
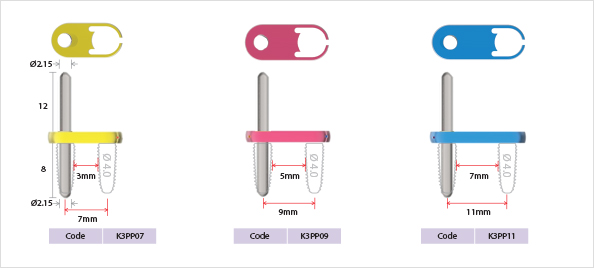
Buccal Position Guide
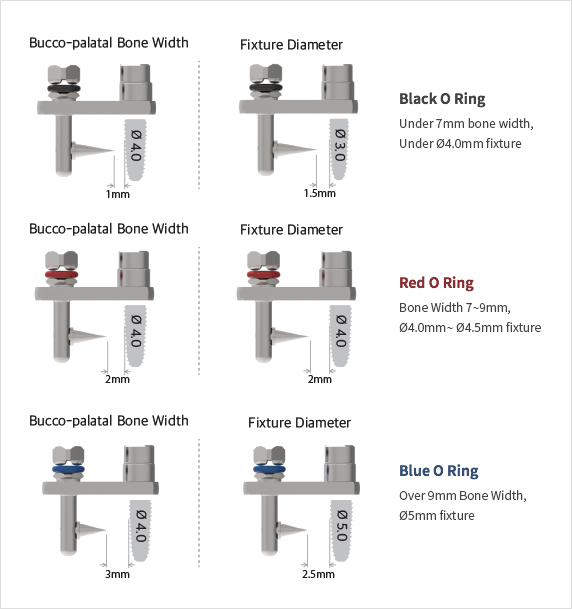
- Use the depth pin positioned at the bottom of the guide
according to the bone width and fixture diameter.
This will enable you to maintain the buccal bone thickness
of the implant.The guide should be connected to the guide holder.
- The length can be distinguished with the O-ring color of the post.
- Be careful in using the depth pin because it is extremely
sharp.
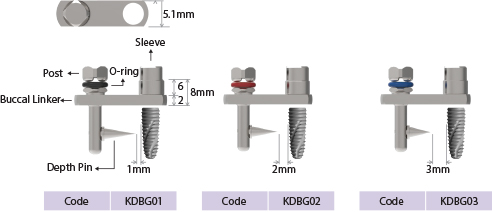
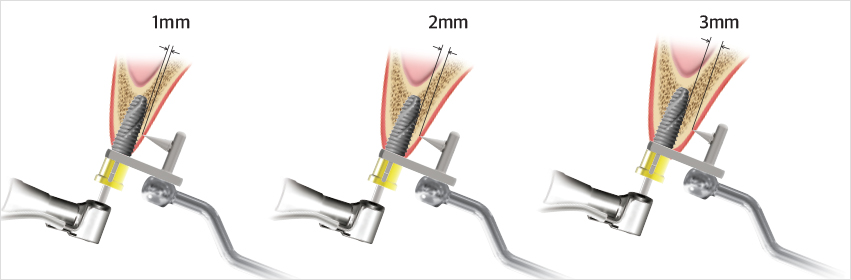

Caution A
Please fix the depth pin of the Buccal Position
Guide to the buccal bone surface 5mm below the gingiva or the alveolar crest.

Caution B
In a defective buccal bone or a thin buccal bone due to tooth
extraction, fix the depth pin of the Buccal Position Guide
to the surface 5mm below the gingival or the alveolar crest,
from the lingual or palatal side.
Caution C
Select the 1, 2 or 3mm Buccal Position Guide depending
on the alveolar bone width and implant diameter
to determine the buccal bone thickness.
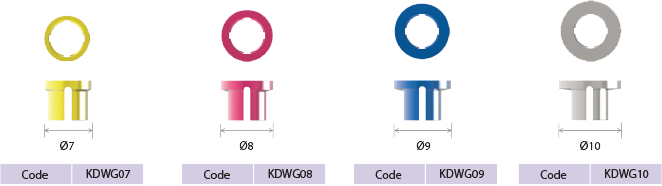
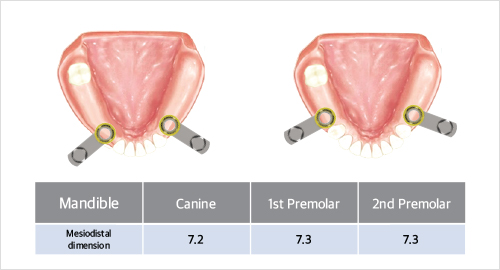
Width Guide
- Select the 7, 8, 9, or 10mm Width Guide according to the implant crown diameter,
mount it on the Buccal Position Guide, and drill the center of the implant.
(the size is distinguished by color).
- The Width Guide is used by connecting it with the sleeve of the Buccal
Position Guide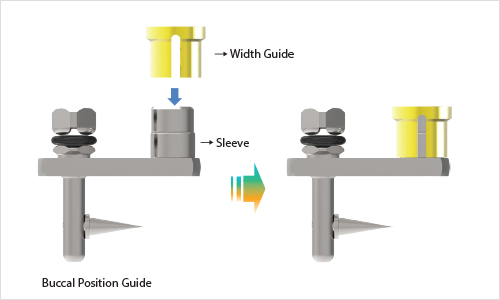
- How to use according to the mesiodistal dimension-1
(Use of the Buccal Position Guide)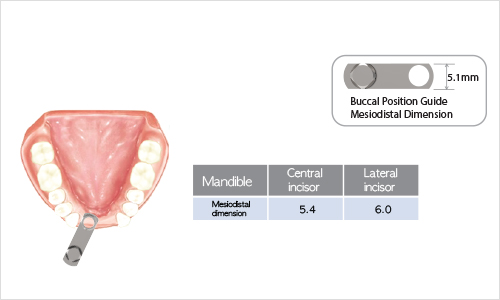
- How to use according to the mesiodistal dimension-2
(Use of the combined Width Guides)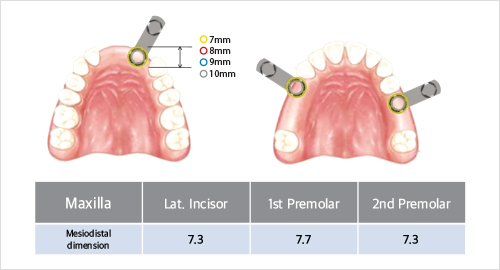
Position Guide
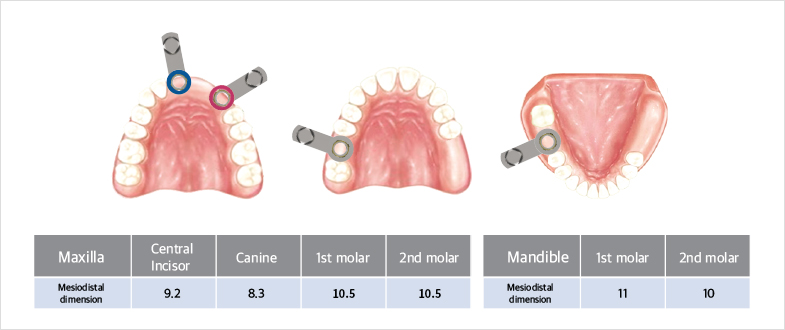
- Guide the drill position according to the distance between implant centerlines (7,9,11mm). The device consists of 3 gaps: 3, 5 and 7mm from the Ø4mm fixture interface.
- In continuous implants, select 7, 9 or 11mm Position Guide according to the crown size, and mount it on the Buccal Position Guide to drill.
* The Position Guide must be used in combination with the Buccal Position Guide and Linker.
It cannot guide the drill position accurately when used alone.
-
Application of 7 mm Position Guide(When the mesiodistal distance between the two missing teeth is at least 14 mm)
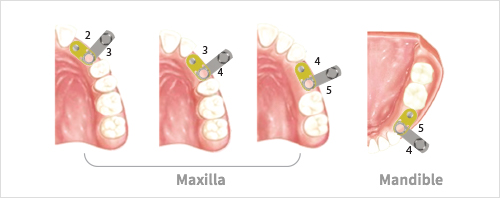
-
Application of 9 mm Position Guide(When the mesiodistal distance between the two missing teeth is at least 16 mm)
-
Application of 11 mm Position Guide(When the mesiodistal distance between the two missing teeth is at least 18 mm)
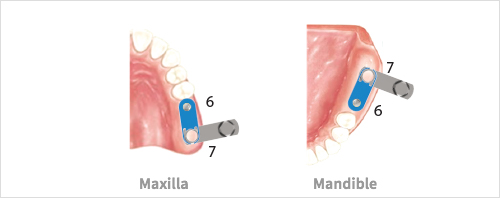
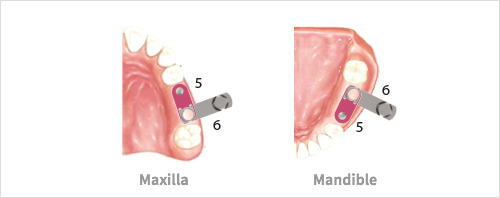
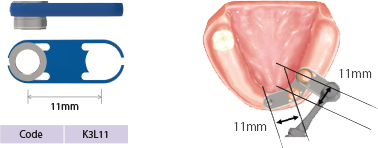
Linker
When you perform prosthesis with a bridge in a continuous implant, connect the 11mm Linker to the position guide and the Buccal Position Guide to drill.
Assembly
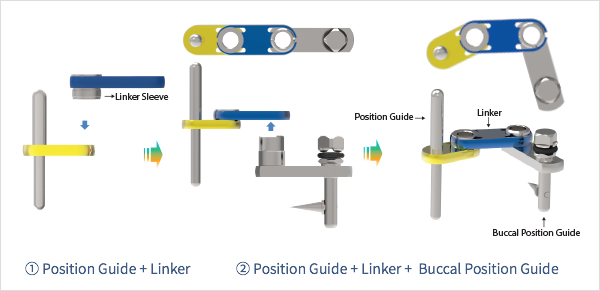
- ① The linker is connected to the Position Guide by setting the Linker Sleeve in a downward position.
- ② After connecting the Linker by setting the sleeve of the Buccal Position Guide in a downward position, it can be used by adjusting it according to the mesiodistal distance.
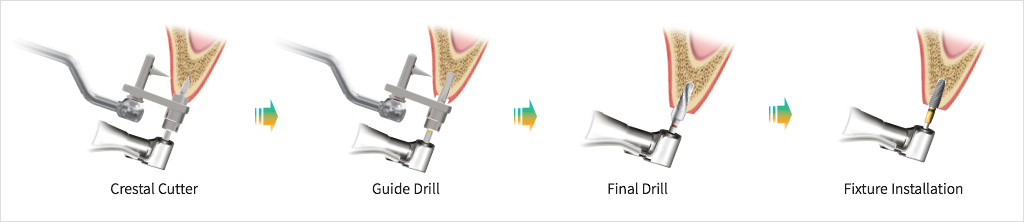
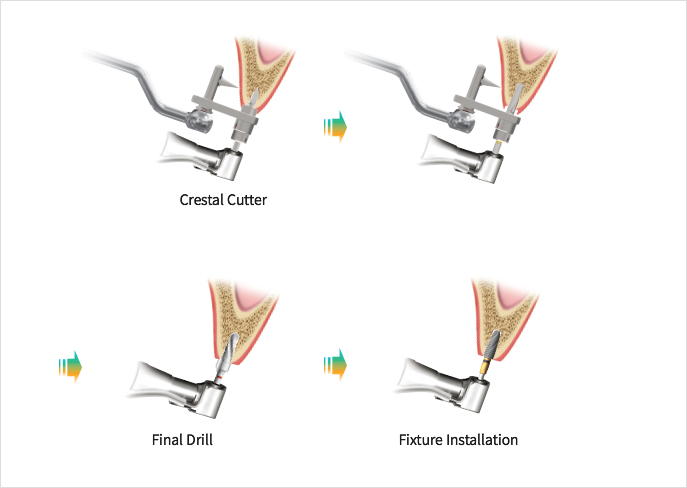
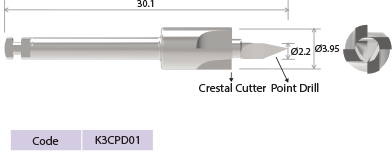
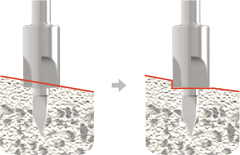
Point / Crestal Cutter Drill
- A hole is created on the cortical bone in order to facilitate the initial drill.
- The gingiva residue is removed while flattening the uneven alveolar bone surface.
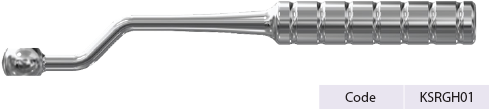
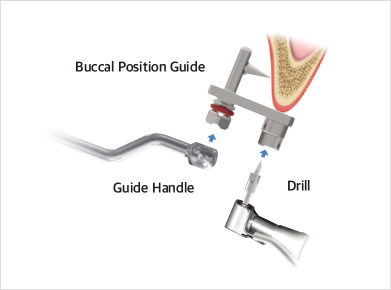
Guide Handle
- The Guide Handle guides the position and direction by connecting it with the buccal position guide.
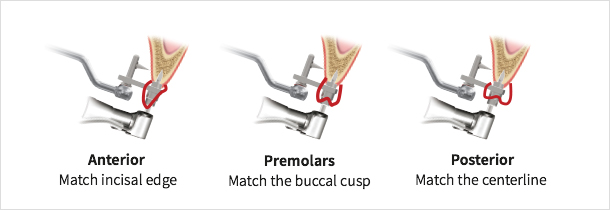
Angulation of Guide assembly
- 1. Mesio-distal angle: parallel with adjacent tooth
- 2. Bucco-lingual angle
* The angle of the guide can be predicted according to the shape of the tooth.
Buccal Position Guide Assembly
- After connecting the Guide Handle to the Buccal Position Guide, fix it at the site where the implant will be placed
and insert the Guide Drill into the hole inside the Sleeve.
Drill Sequence (Flapless Surgery)
- Form basic holes with a crystal cutter. Then, select a drill sequence according to the implant diameter.