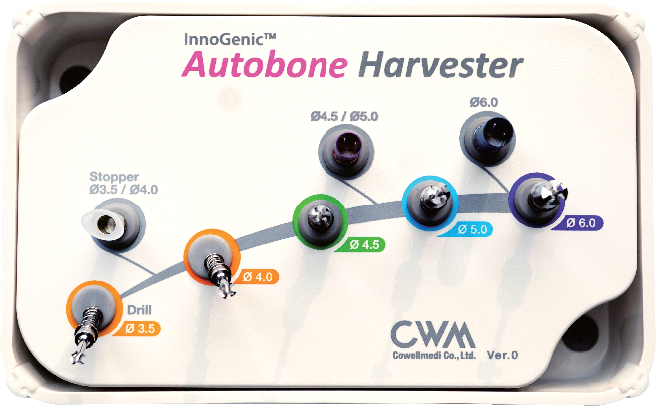
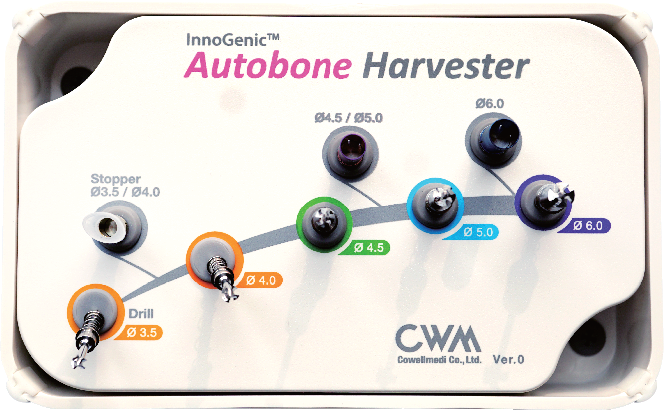
InnoGenic™ Autobone Harvester
[KIAH001]
- Maximize Your Return On Minimal Investment, Guaranteed!
Key Concepts
Maximize your return on minimal investment
The key concept of the Autobone Harvester Plus to harvest a large amount of the autogenous
bone chips from the implant site that can be wasted into the suction during implant drilling procedure.
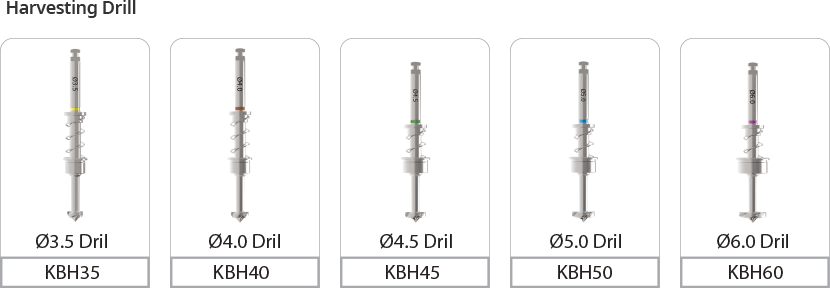
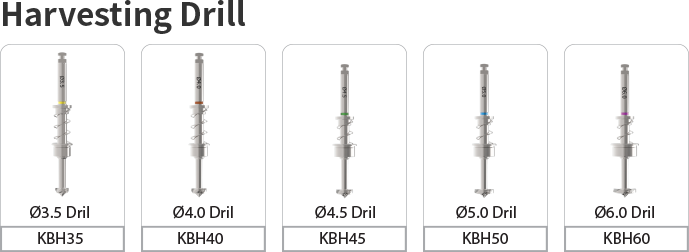
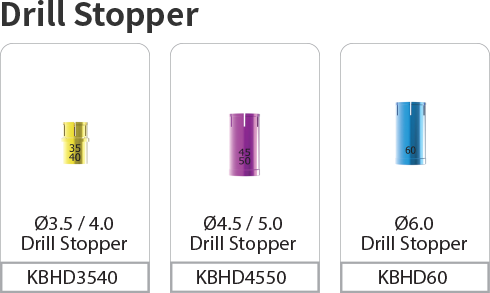
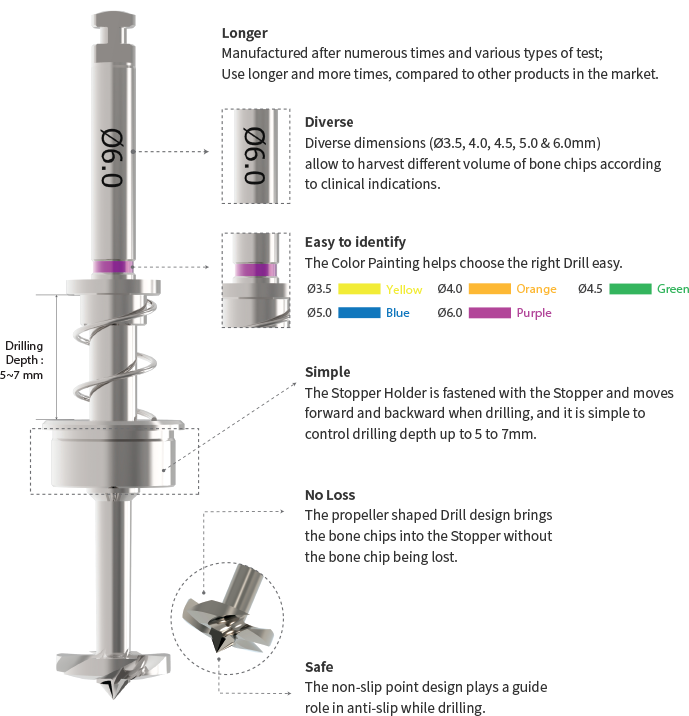
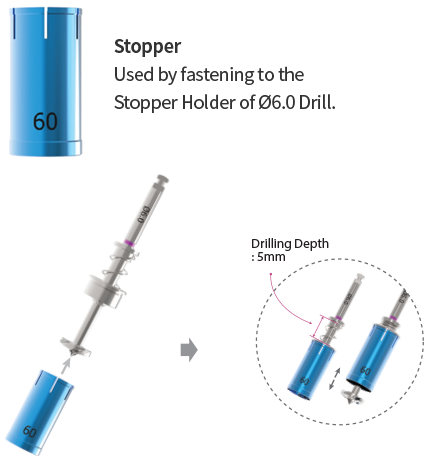
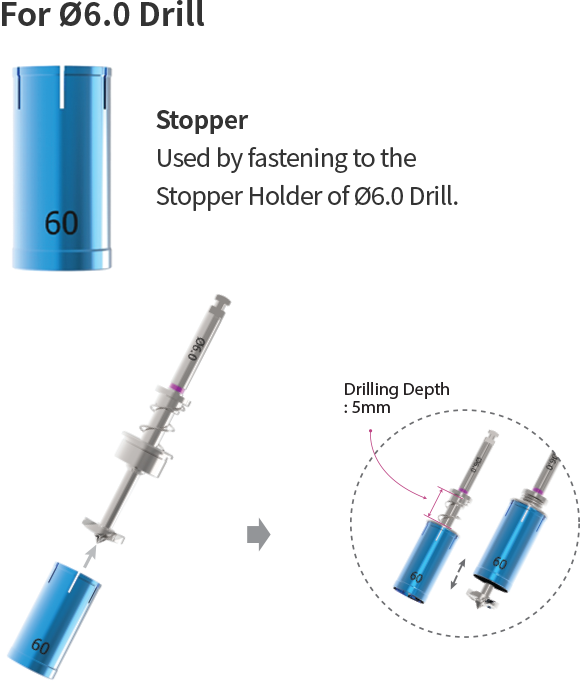
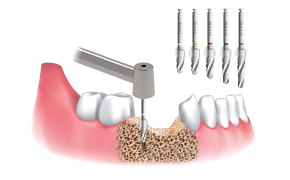
Features: Drill
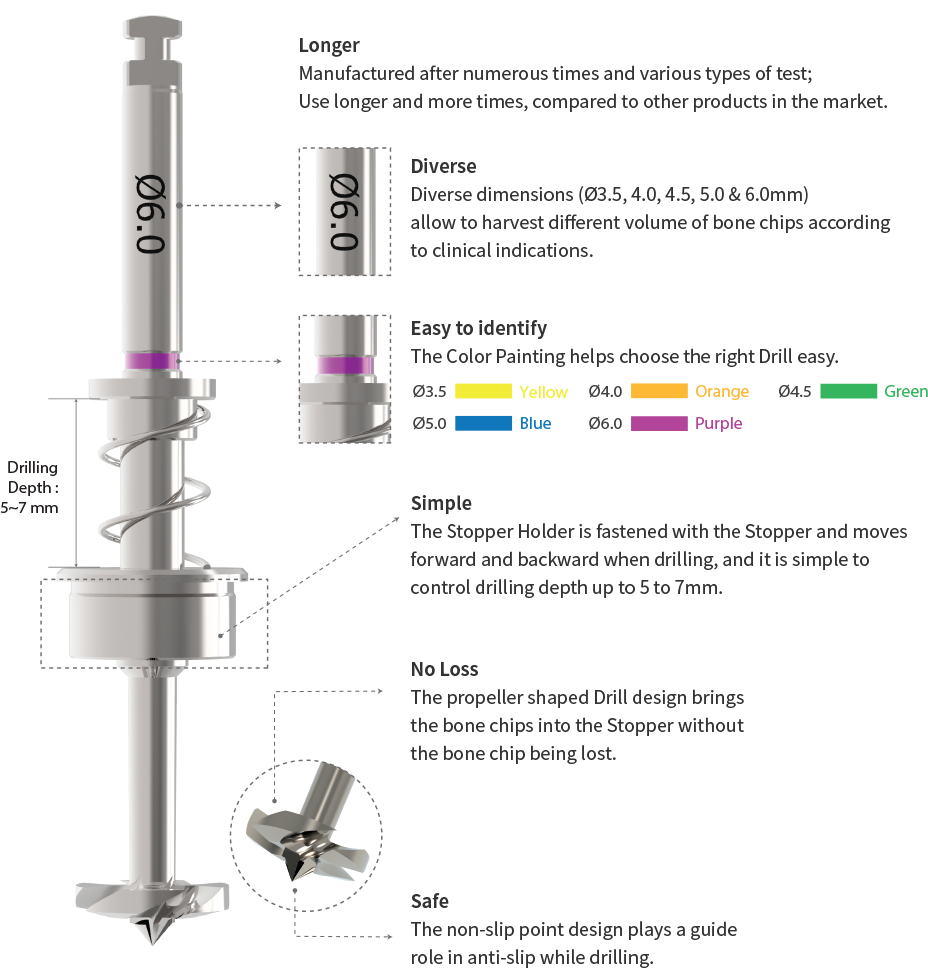
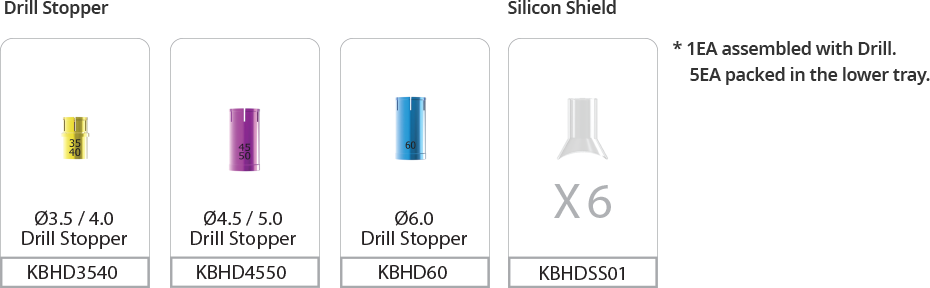
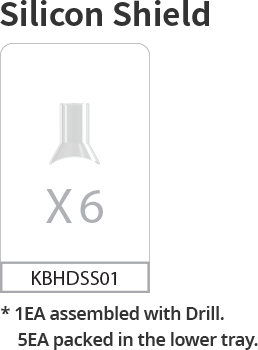
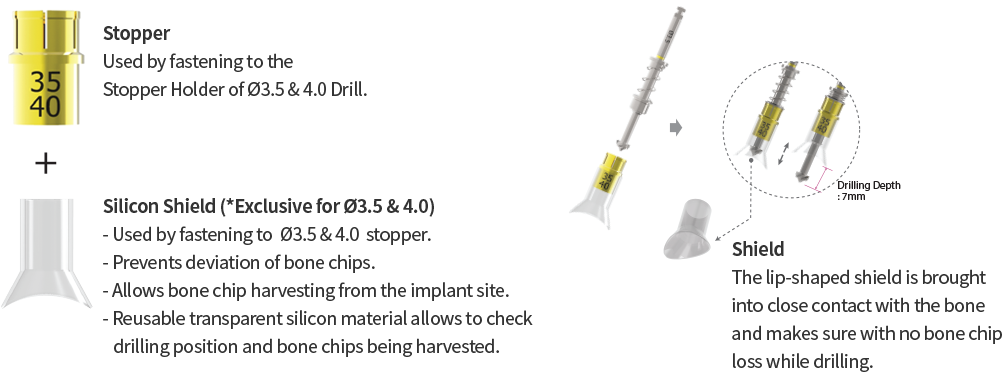
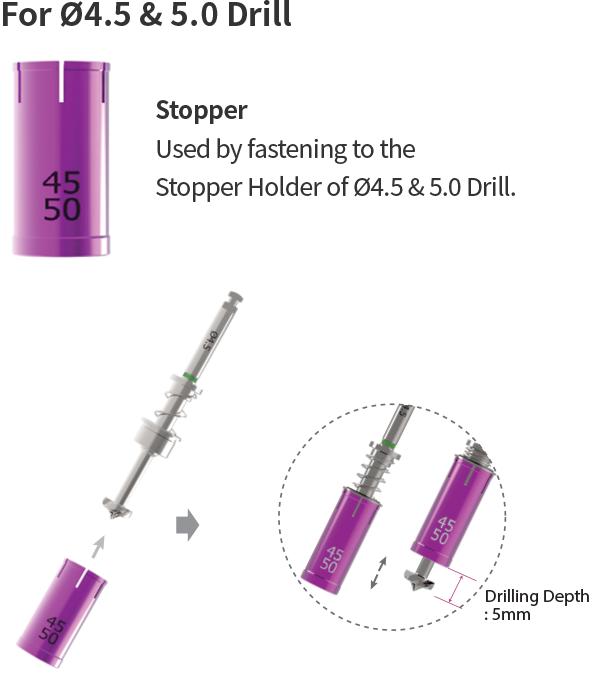
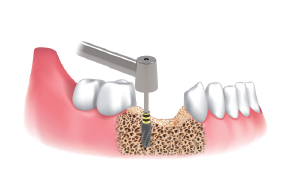
Features: Stopper & Silicon Shield
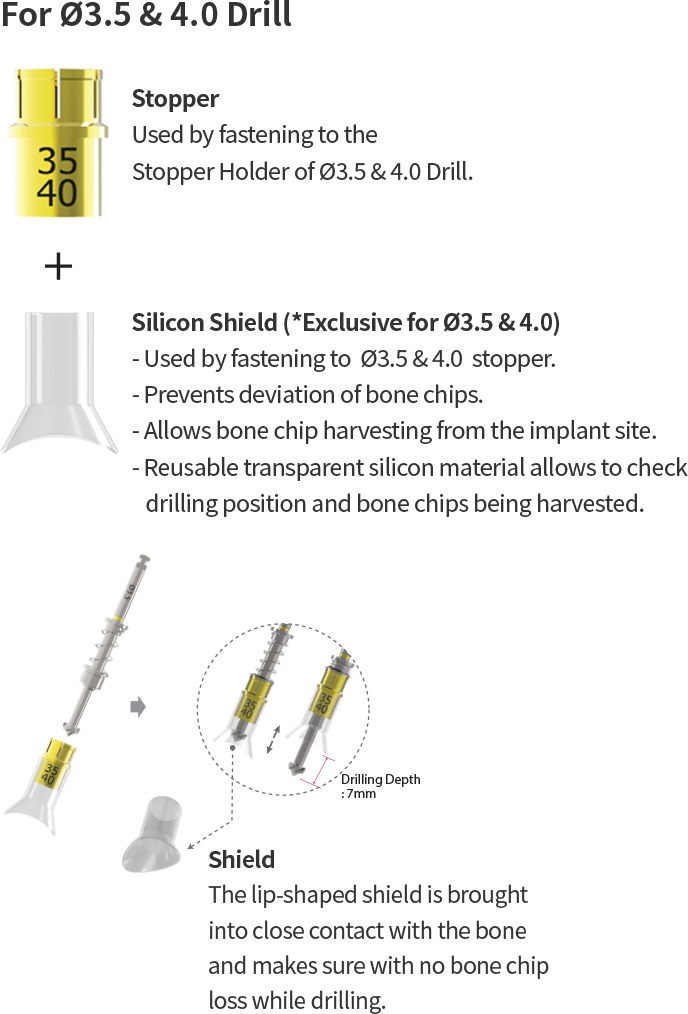
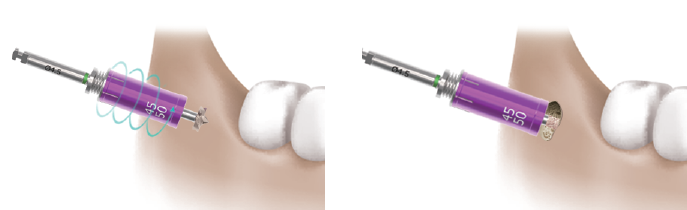
For Ø3.5 & 4.0 Drill

Harvesting sequence :
Implant Site using Ø3.5/4.0
Harvesting Drill with the Silicon Shield
-
Point drill to mark harvesting and implant site.
-
Select Ø3.5/4.0 Drill and insert the Stopper into the selected Drill. And put the Shield on the Ø3.5&4.0 Stopper.
-
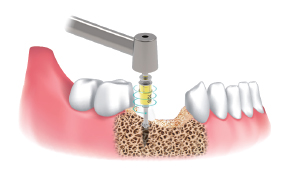
Drill at 300 to 500 rpm with irrigation and harvest bone chips.
-
Disassemble the Silicon Shield, the Stopper and collect the bone chips for bone grafting.
-
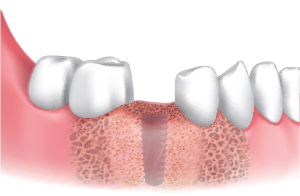
Use Final Drill (equal to or over Ø3.5/4.0) according to the drilling protocol of the manufacturer and treatment planning.
-
Place the implant.
-
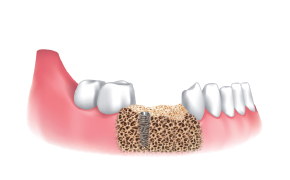
Apply the harvested bone chips on the site.
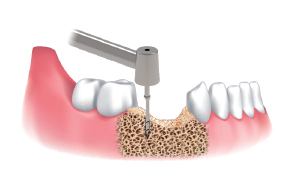
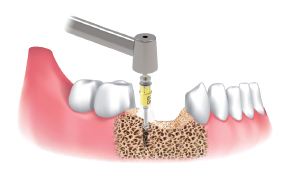
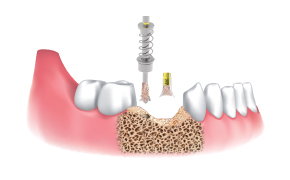
Harvesting sequence :
Buccal Bone Harvesting
using Ø3.5/4.0/4.5/5.0/6.0
Harvesting Drill
Select the drill according to its
diameter and clinical indications.
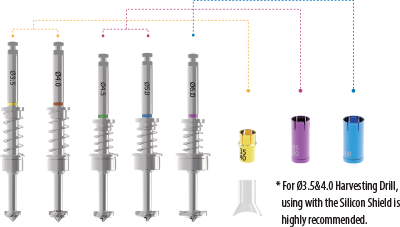
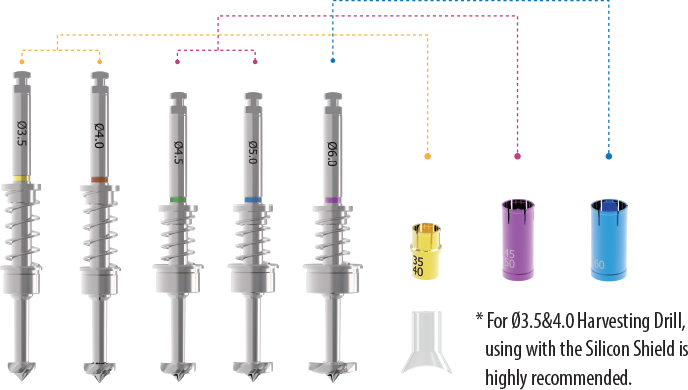

Drill at 300 to 500 rpm with irrigation and harvest autogenous bone chips.
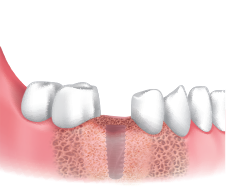
Apply the harvested bone chips on the site.
Drill at 300 to 500 rpm with irrigation and harvest autogenous bone chips.
Apply the harvested bone chips on the site.
A Clinical Case using Ø3.5/4.0 Harvesting Drill
by Dr. Soohong Kim, DDS, Ph.D
-
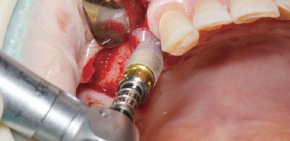
Drilling at 300 rpm with irrigation was carried out after marking implant and harvesting position.
-
The Silicone Shield was brought into close contact with various types of bone level and prevented bone chip loss.
-
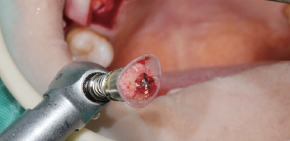
The amount of bone taken was easily ascertained, through the transparent Silicone Shield.
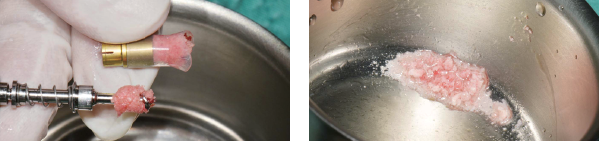
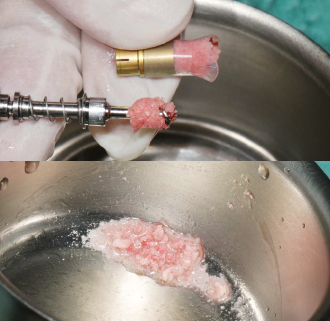
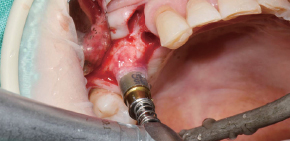
The bone was transferred to bone dish after disassembling the Silicon Shield and Stopper.
The amount of the bone was much more than expected.

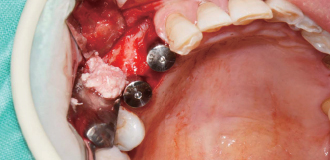
After the implant placement, healing abutments were connected and carried out GBR in the defected area.
* 2 Step Harvesting : Drilling to 7mm is recommended after transferring bone chips to bowl since the Stopper & Silicon Shield are fully filled with bone chips while 4mm drilling.