MFR KITMulti Functional Removal [KHA001]
Easy Removal of Fractured Fixture / Screw / Abutment
MFR Kit Composition - Middle Tray
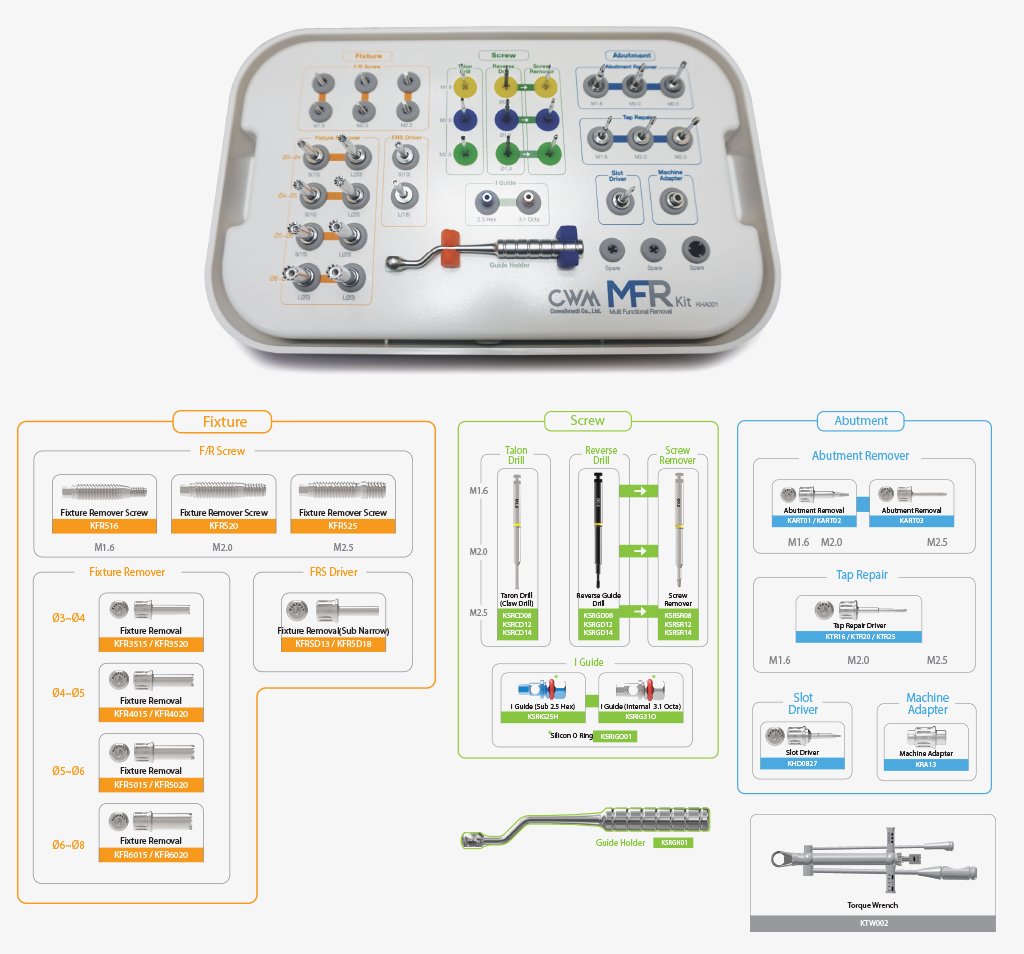
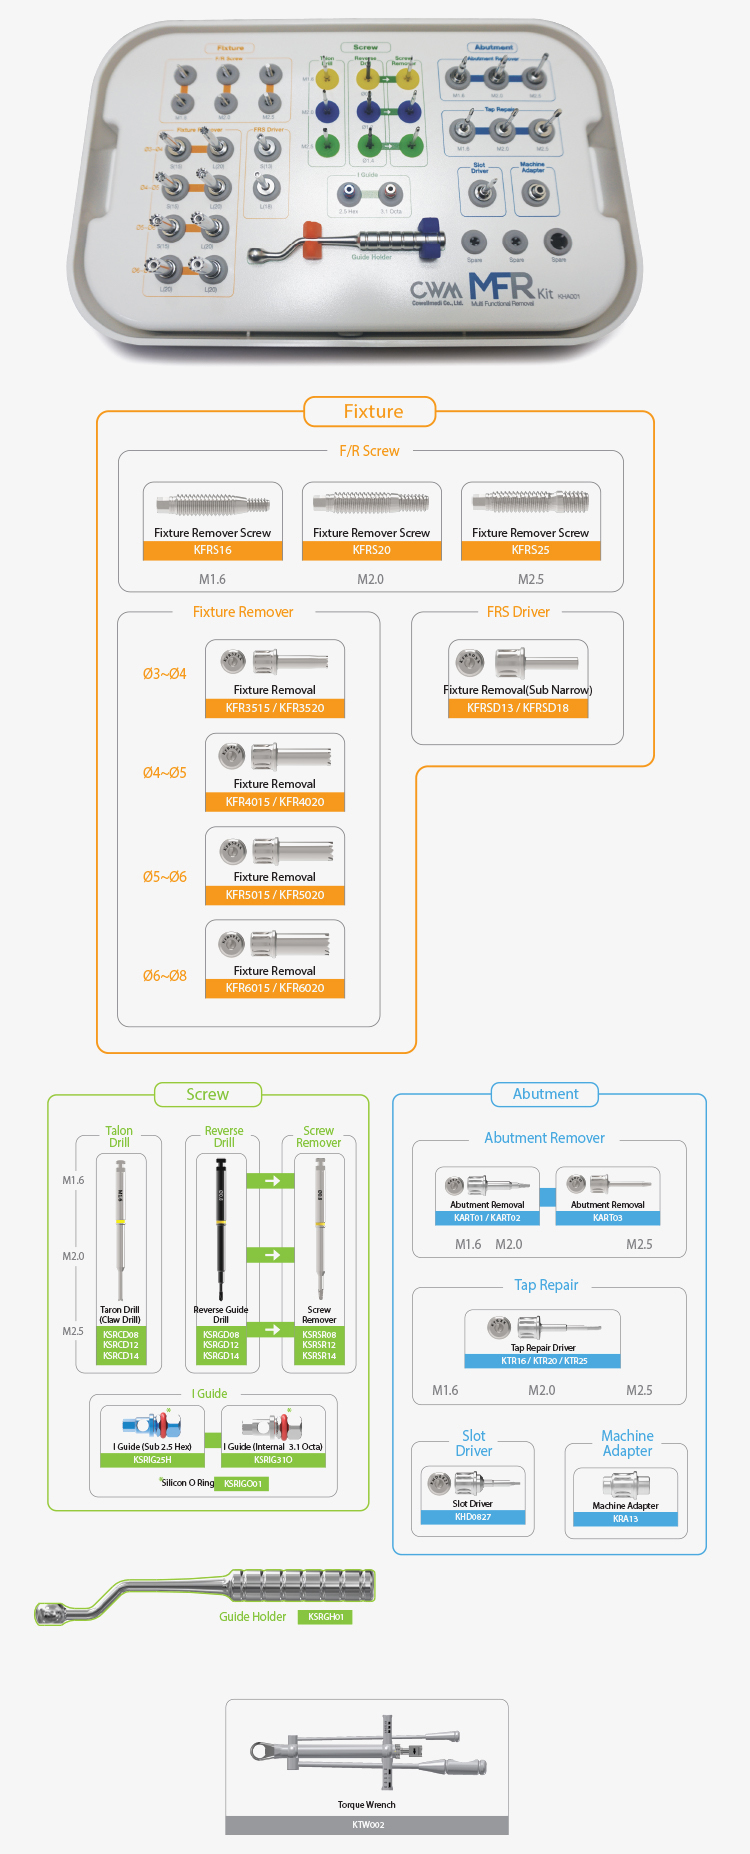
MFR Kit Components
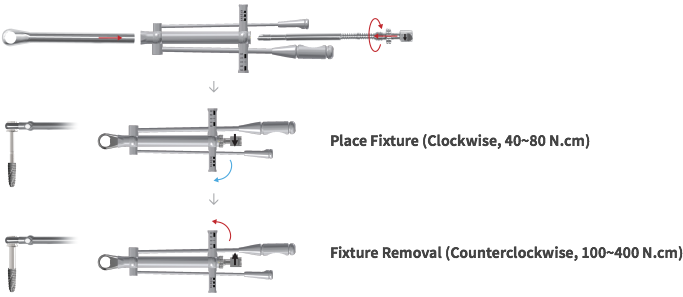
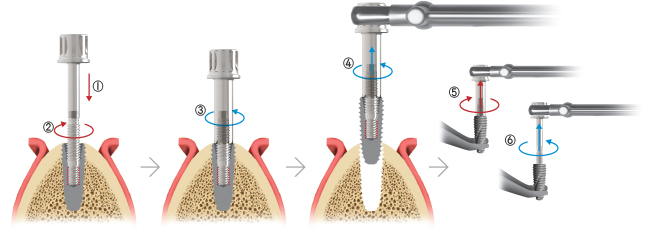
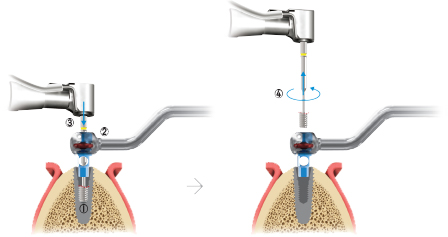
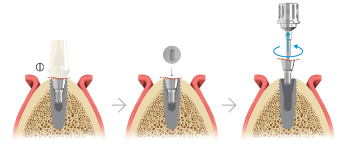
1. Fixture Removal System
- ① Fixture Removal Screw connect to FRS Driver
- ② Connect to Fixture (Clockwise 40~60 N)
- ③ Fixture Remover connect to F/R Screw (Counterclockwise)
- ④ Eliminate Fixture after connecting to Torque Wrench (Counterclockwise, 100~400 N.cm)
- ⑤ To remove the fixture from Fixture remover, use Vise to fix the Fixture Remover and connect to Torque Wrench
- ⑥ F/R Screw connect to FRS Driver and then use Torque Wrench to eliminate F/R Screw (Counterclockwise)
- ※ it is recommended only one time to use F/R Screw (if more than 100 N.cm , there is a possibility to fracture or bend),
but it is possible to use twice if it is less than 100 N.cm - ※ Sufficient Irrigation required for removing fixture
- ※ When the maximum torque is exceeded, the fixture may be bent or fractured.
- ※ If fixture can not be removed even with maximum torque,
remove Fixture Remover & F/R Screw, remove bones around fixture while using Round Bur and retry to remove
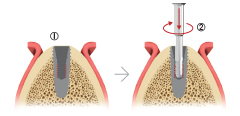
2. Screw Removal System
Talon Drill
- ① Screw is broken inside the fixture (check the broken screw size)
- ② I Guide for Fixture Connection Attached to guide holder and fastened to fixture
- ③ Insert Talon Drill into I Guide Hole
- ④ Remove the screw by pressing force (counterclockwise, 60 ~ 80 rpm)
If I Guide and fixture can not be correctly connected, the path is not correct.
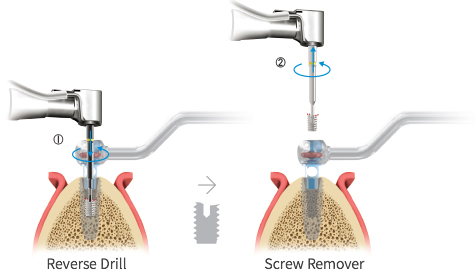
Reverse Drill & Screw Remover
If the screw could not be eliminated by Talon Drill
- ① Hole is formed on the fractured screw (depth 1 ~ 2mm / counterclockwise / 1,200 ~ 1,400 rpm)
- ② Use Screw Remover according to the created drill hole, remove the screw by pressing force (counterclockwise, 80 N.cm)
- ※ If the path of I Guide and Fixture does not match, it is difficult to remove the screw because the Drill Hole is away from the center of the screw
- ※ Reverse Drilling requires removal of chip by Irrigation & Suction
- ※ Fractured screw may be removed during reverse drill hole creation
- ※ If necessary, fasten to machine adapter and connect hand and torque wrench.
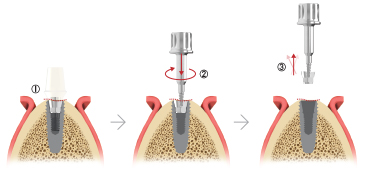
3. Abutment Removal System
Abutment Remover
- ① 2 Pieces type abutment is fractured
- ② Connect to Abutment Remover (Clockwise)
- ③ Connect correctly and wiggle to left and right side
Tap Repair
- ① thread which is inside of Fixture is occluded and damaged
- ② reproduce Thread using Tap Repair
Slot Driver
- ① 1 Piece Type abutment is fractured. Healing and Cover screw damaged
- ② Forming Slot on the surface of fractured abutment using Round Bur
- ③ Slot Driver will be connected to Slot on the surface of Fractured Abutment and eliminate it(Counterclockwise)
4. Torque Wrench