MFS KITMulti Functional Sinus [KHA001]
- Approach all maxillary Sinus Lift at Once with MFS kit.
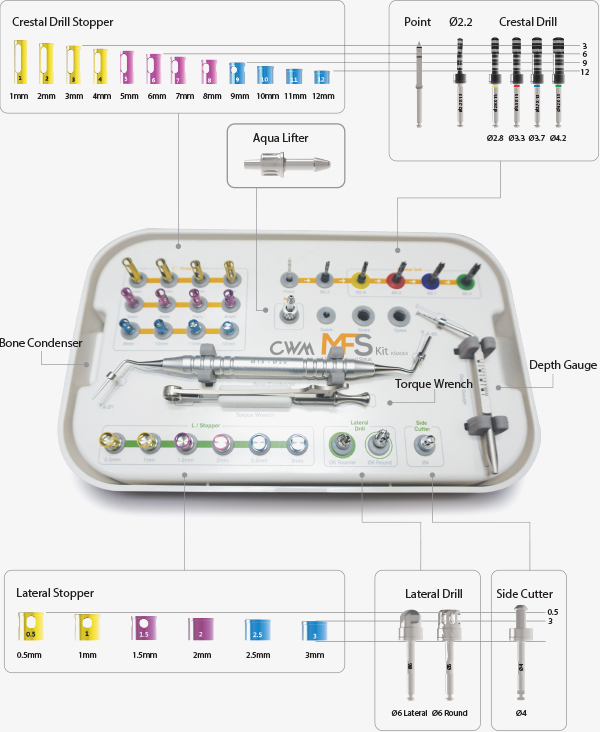
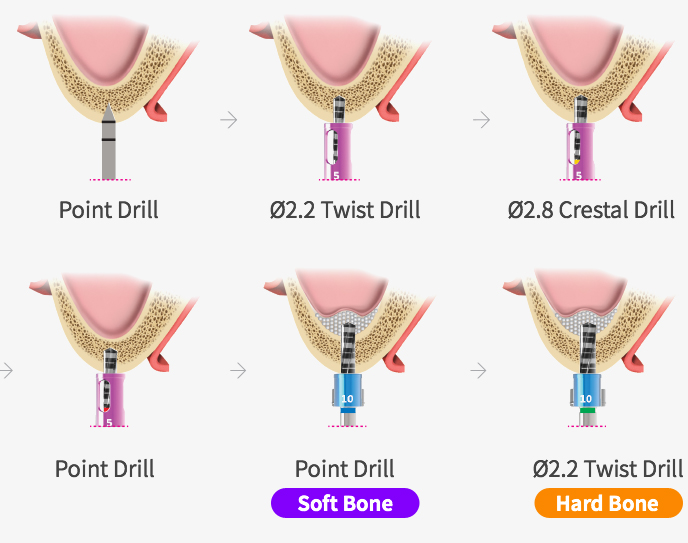
Crestal Approach - Components
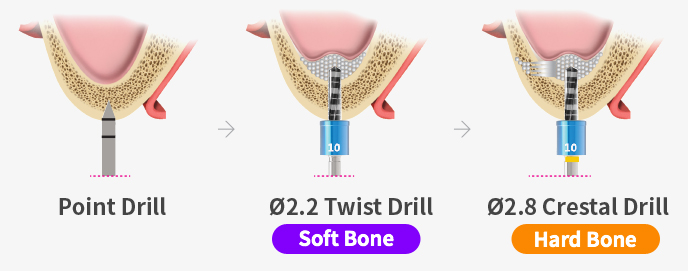
1. Point Drill 800~1000rpm
- Locate the point of Perforation on Cortical Bone.
- In the case of the remaining bone height is as low as 3.5mm, Pay attention to Drilling.

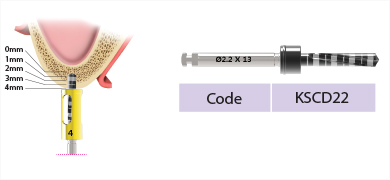
2. 2.2 Twist Drill 800~1000rpm
- Use for making Guide Hole before using Crestal Drill.
- Use Drill Stopper according to the remaining bone.
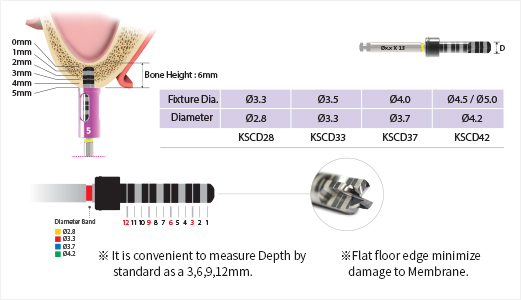
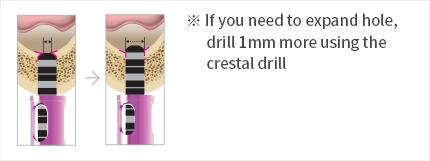
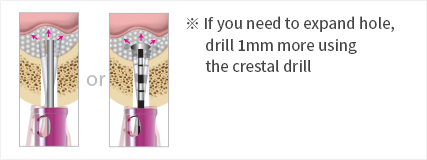
3.Crestal Drill 400~800rpm
- Use the Crestal Drill sequentially according to the diameter of the fixture to be placed
- Can also be used if Sinus floor is Flat, Incline, Septum
- Crestal Drill can be used about 50 times (depending on bone quality)
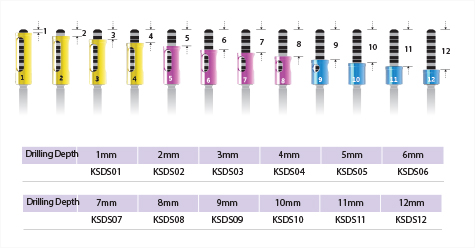
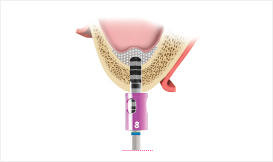
4.Crestal Drill Stopper
- Connected with a stopper to be drilled to the same length of
the cartilage height of maxillary sinus which is measured by - If you don't have CT, tighten the stopper one step
lower than expected and gradually increase the length.
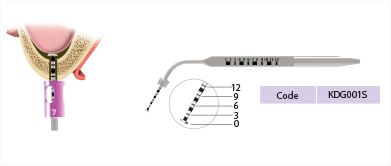
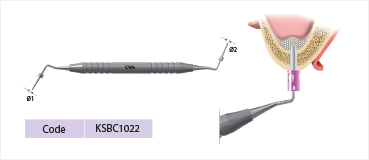
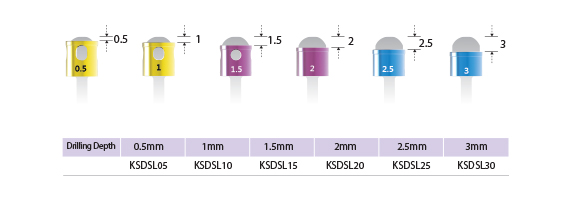
5.Depth Gauge
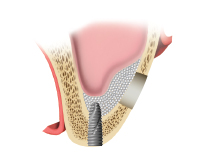
- Measure thickness of the residual bone after checking the perforation of the cartilage of the maxillary sinus (Do not open completely, only the entrance side is opened).
- Stopper is attached to the base of the residual bone
to separate the cartilage and membrane from the maxillary sinus.
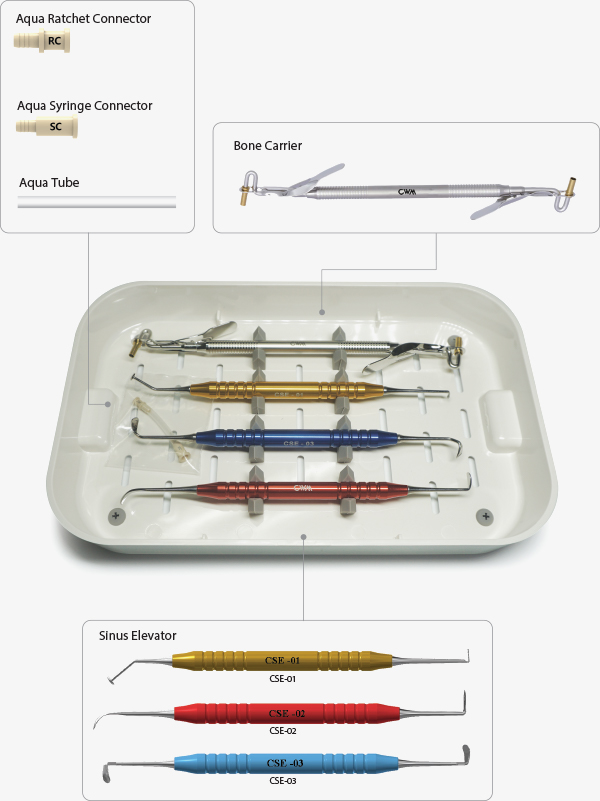
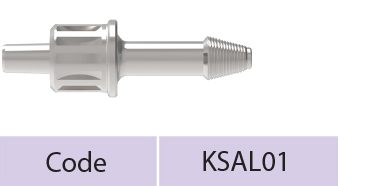
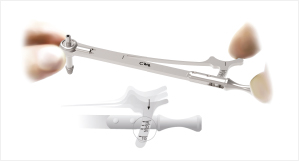
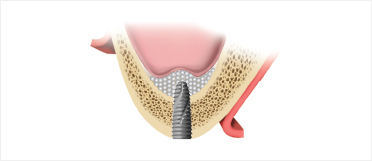
6.Aqua Membrane Lifter System
- After confirming that elevation of the cartilage of maxillary sinus,
elevate membrane with Aqua Membrane Lift system.
- ① Fasten Lifter to Drill Hole
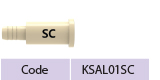
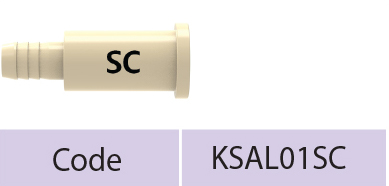
- ② Connect tube to Syringe using Syringe Connector (SC)
- ③ Inject saline solution to the amount of bone graft
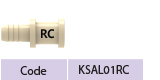
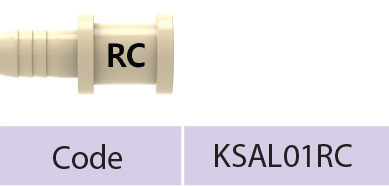
material to be used for syringe - ④ Tube connection to Lifter Drill using Ratchet Connector (RC)
- ⑤ Inject Saline solution
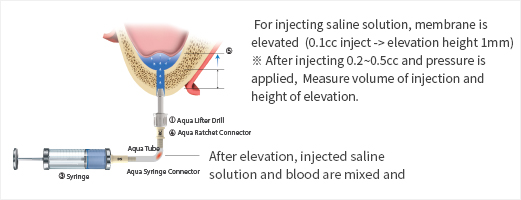
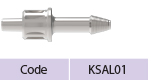
- Aqua Lifter
- Aqua Ratchet Connector
- Aqua Syringe Connector
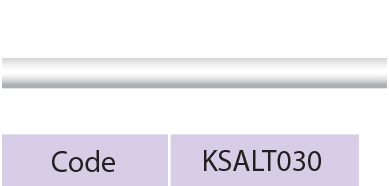
- Aqua Tube
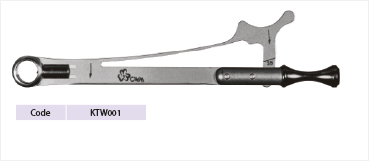
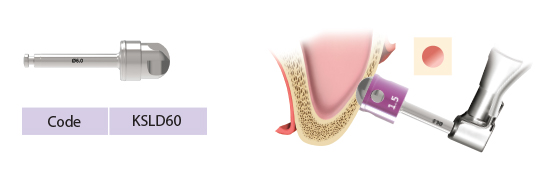
7.Torque Wrench
- Use the Torque Wrench to fix aqua lifter in the hole formed using crestal drill.
8. Bone Carrier
- Insert Bone graft material using Bone Carrier.

9. Bone Condenser
- After connecting stopper with Bone Condenser,
elevate bone graft materials to inside of maxillary sinus. - Rotate bone graft material using Bone Condenser to disperse bone
graft material (It is possible to do it with Depth Gauge)
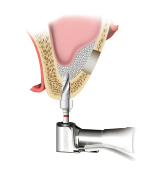
10. Implant Drill(Final)
- Drilling 1~2mm more deeply than steps of Crestal Drill
11. Implant Placement
- To get initial fixation, if the residual bone is less than 3mm,
do not place the implant, only do bone grafting.
Crestal Approach - Drill Sequence
1. Ø3.3 Narrow Fixture

2. Ø3.5(Ø3.7) Fixture
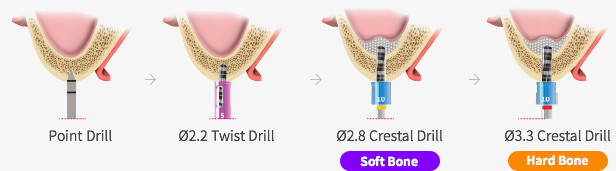
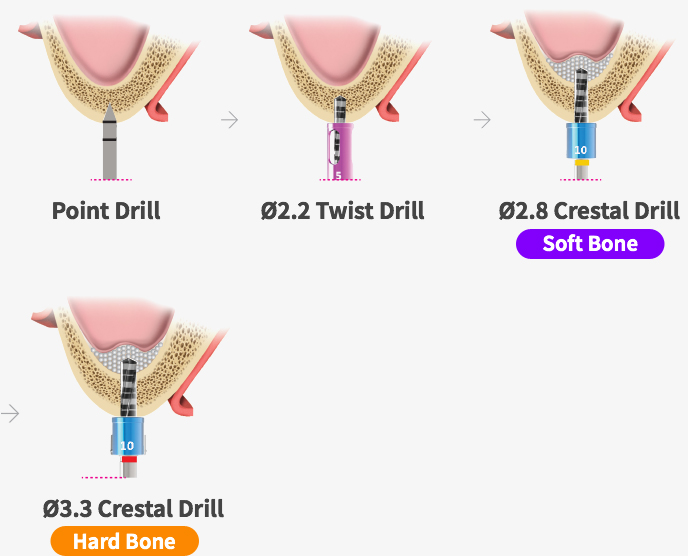
3. Ø4.0(Ø4.2) Fixture
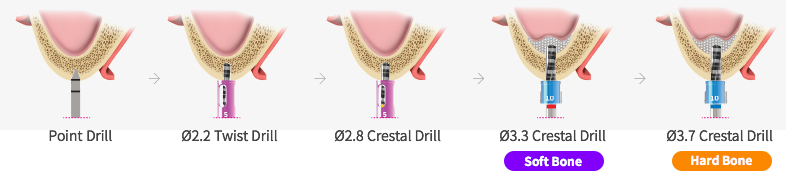
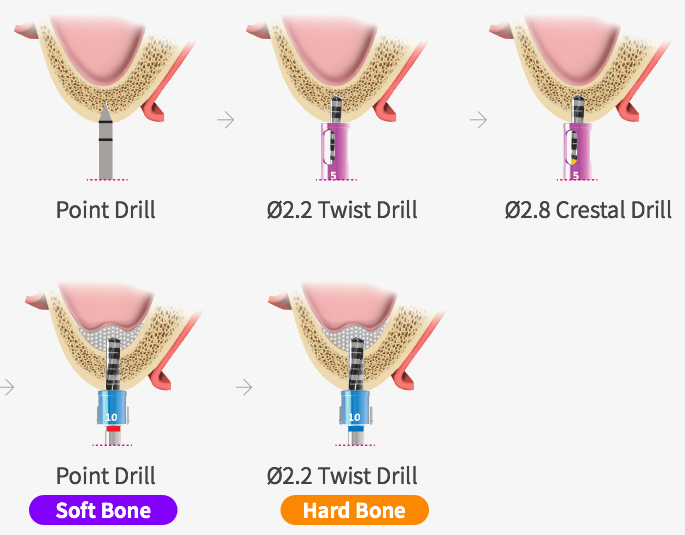
4. Ø4.5(Ø4.6) Fixture

- ※ it is needed final drilling before placing implants in the case of more than Ø5.0 Fixture Normal Bone
- ※ Use a drill that is one step shorter than the implant (Ex. 10mm implant, 8 ~ 9mm Drill)
Lateral Approach - Components
1. Ø6 Lateral Reame 800~1000rpm
- After tightening the stopper according to height of the bone, Drilling (round shape)
2. Ø6 Lateral Round Drill
- After tightening the Stopper according to the height of the bone, Drilling (round shape edge)
- Residual bone after drilling should be in the original position,
after lifting maxillary sinus.

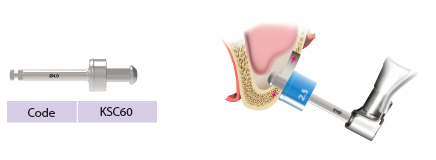
3. Lateral Stopper
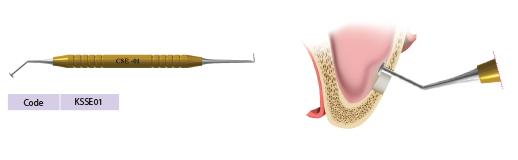
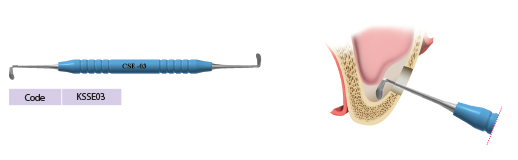
4. Sinus Elevator
CSE-01 : CSE-01 Initial Elevation of Sinus Membrane
CSE-02 : as stepwise, after using CSE-01, used for elevation of sinus membrane
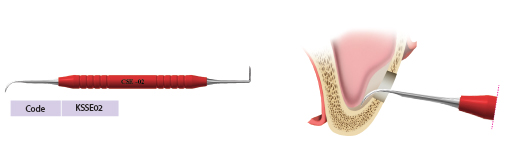
CSE-03 : as stepwise, after using CSE-02, used for elevation of sinus membrane
5. Ø6 Side Cutter 800~1000rpm
When you expand Window, must be connect with Stopper
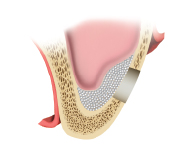
6. Sinus Bone Graft
7. Implant Drill (final)
8. Implant Placement